Wednesday, 8 May 2013

Darth is done!

So a friend asked for Darth Vader as a plushie as a present for her partner. While Darth Vader is pretty cool and quite striking, in a lot of ways he could be very unexciting as there is a limited amount of detail and a lot of black.

I decided I would have some fun by making the helmet removable so I could have the scarred face underneath and that I would try to use some fake leather since I had been kindly donated some. Fake leather on such a small scale was not going to be easy to sew inside out so I had to find other ways round using it.

Planning sketch for Darth Vader plushie

Fortunately for the body, I had some left over black cotton and I decided that the better part of valour lay with making the helmet out of black felt to make up for the fake leather trauma that was bound to ensue.

Parts of Darth Vader plushie cut out and embroidery started for control panel


I had a bunch of different thoughts running through my head trying to pull me in different directions so I tried to make myself work in a linear fashion.

After cutting everything (ish) out, I started by embroidering the control panel, and then put the basic body and cape together with the head. The cape was tedious as it needed to be sewn on before Darth was sewn inside out and got in the way of doing that. At least it didn't need hemming. Thank YOU fake leather. It also thankfully was black inside so I didn't need to line it either. The basic body went relatively swiftly really all in all.

Basic Darth Plushie part completed - control panel and face embroidered

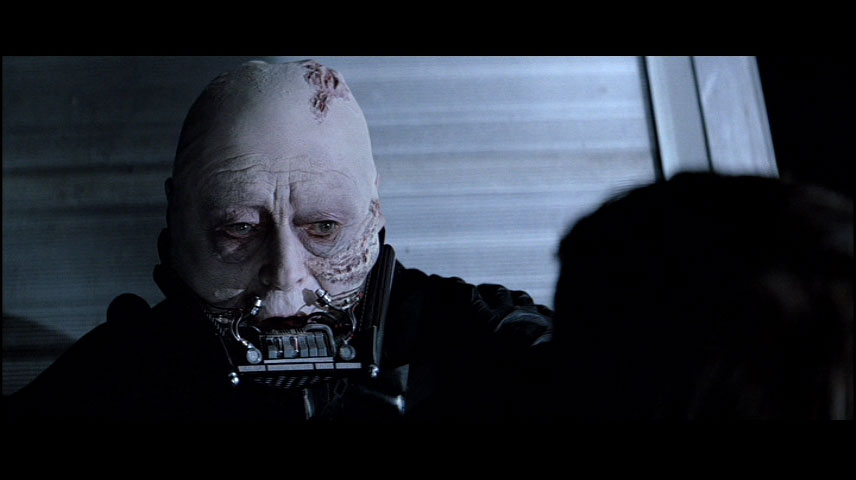
I did dither a bit about what colour to make Darth's panda eyes but I'm quite happy with my choice in retrospect. Since Darth's helmet sort of fixes to a collar I decided to use black felt around the neck to bridge between body and the head.

Darth Vader Plushie basic body complete.  
For the scar on the top of the head I decided actually sewing it after the head was sewn up would create a realistic scar ridge and I quite like how it came out.

With that done I decided to concentrate on the helmet. As always trying to match it up to the real details makes you realise both what will make it distinctive and what details you don't register consciously.

I was incredibly grateful it was made of felt however as it made it a lot more straightforward to put together. I used overlapping parts to get some of the details and embroidery for the eye holes and the grill for the mouth.

Then I started work on the boots and gloves which I foolishly decided to do in fake leather. Because of this I had to sort of sew them round the stuffed body. The gloves came out smaller than I'd like but the boots came out alright, if a bit messy round the back (just don't look).


So there he is, complete. I like how the helmet came out although it isn't quite how I would have liked it. All in all rather more fun than I expected for a black on black plushie.

Thursday, 2 May 2013

Darth decisions

So Darth Vader. It's gonna be a bit simple if I just do it plain so he's going to have a removable helmet.

This means I need to decide how to do his face. These shots are the angle I'm thinking about

Screenshot of Darth's face under the helmet from original movie

Photo of what I think is an official bust of Darth's face under the helmet

So there are several aspects I am thinking about. The first is the base for the face. Normally my base material is a pale pinky caucasian colour and obviously Darth is caucasian ish, but he's also kind of not seen the sunlight and ill pale. I'm not sure whether I should go for a basic white. I don't really have anything between pale pinky and white. I had thought about a greeny colour but he's not really green. My current pale pink is not all that strong a colour so it might do.

The other aspect I want to work out is the very panda shadowyness round the eyes. NormallyI'd want to do that with embroidery. I am tempted also to do it with a thin layer of black gauzy fabric but I think this may come out looking odd. I think I will stick to embroidery.

This is also the plan for the scar on the head - probably also embroidery.

Finally I need a reference image for the control panel :

Uploaded with ImageShack.us

So this one will have to do, alongside this one

Billie Jean is not my lover....

This is the second time I've had a song stuck in my head while making a plushie.... also ....Thrilllerrrrrrrrrrrrrrrrrrrrrrrrr

Anyhoo. This one was not all that bad to make.

I used a model as a template because it was hard to get any details out of real images of MJ in the Thriller video on google. I'm afraid I was too lazy to do my own screen grabs.
Model of Michael Jackson in the Thriller song video
I did have some debate about which red fabric to use but I chose a slightly shiny fabric. With some convenient black cotton knocking around and some newly bought light brown felt it was really pretty easy work.

Really the pattern became extremely easy to adapt. Basically a plain red body with some added black stripes. Hands extended so that the sleeves are more rolled up, and a bit of embroidery for the curls on his face.

Michael Jackson Thriller plushie inside out, nearly finished.

What made it especially easy was that all the fabrics were thin and light. Also the lack of jacket was a big help. I did consider making one but to be honest a red jacket over a red basic tshirt with red trousers seemed pointless so I didn't.

Completed Michael Jackson plushie in Thriller outfit
Touchingly the recipient immediately messaged me the moment it went up on facebook and walked round to collect! Bless. That's appreciation. I charged 1 cadbury's creme egg.

Thursday, 25 April 2013

Upcoming

The list is sort of shorter. Please try and resist the urge to ask for at least a little bit people.

Next up is Michael Jackson himself. Hopefully actually should be pretty easy. His suit is basically all red with some black bits.

After that Darth Vader - easy and hard at the same time. I may be lining his cape and will be making a removable helmet.

Finally after that the winsome Elizabeth from Bioshock.

After that, a pause methinks.

10, Tennant, pun intennanted

So the 10th Doctor mark 2 was a significantly different project to the first time I made it. It is, in fact strange to realise that this is the 11th plushie I've made, and that this particular design is where it all began. You can buy the pattern yourself for this one and make one sort of like mine It's by Michelle Coffee on Etsy - 9" Human Plush David Tennant/Castiel PDF pattern.

You can also read my first post on making my first ever plushie in the post "I don't need another blog"

Despite this being the original design I'm afraid that I never leave the pattern completely alone. It may amuse people that despite it being entirely accidental I don't think all of my plushies have eyebrows like the design asks for. I seem to have remembered on the first few and then forgotten.

Cut out pieces of fabric for second 10th doctor plushie


More seriously, rather than applique the shirt part of the suit on TOP of the blue suit as I did with the first one as that was what the original instructions said, I did what I've done in many other plushies since and cut a v out and put the shirt behind, making it lie more like a normal shirt. I also didn't bother with the complicated shape of the tie in the pattern, I just made what is effectively a long strip of red. It looks fine at such a small scale. I also corrected the shoe colour. Tennant wears MAROON shoes with a blue suit, and WHITE shoes with the brown suit.

I have to say hemming every single piece of the jacket does not get any more fun the more I do it. It's enough for me to give up on using non felt or fraying fabrics altogether for the coats/jackets. But I still like the aesthetic of reusing otherwise unusable pieces so I don't know. I never seem to get the length right. Somehow my plushies have longer arms by a long way than the jackets unless I extend the arm lengths. No idea how that happens. I also sometimes have to make the arms skinnier to fit in the jacket.

This particular brown furry material for the hair looks great but is a bit thick and sometimes hard to hem and sew down. Still I kind of like how it looks. It feels hair-like and is quite tolerant at hiding different brown colour threads when I sew it down.

I really enjoyed the cotton of the suit. It was just a really easy fabric to manipulate and really easy to sew. It's left over from Captain Jack.

So there you go, it's finished and on its way very soon.

Completed second attempt at a 10th doctor plushie


For comparison, this is the first one I made

First attempt at 10th Doctor plushie


Monday, 15 April 2013

Dream a little dream....

It appears to be bad time right now for many people, but fortunately no-one I know or am semi closely related to is OK. I send love to all affected throughout the world by violence and suffering big and small, and offer a small distraction. A short post on my latest creation.

I was asked to make the character known by the multiple names of Dream, Morpheus and Sandman, one of the Endless, most particularly his incarnation in the comics written by Monsieur Gaiman. Not sure why he got a French mister there but meh.

There was a certain level of uncertainty about how to approach the doll as in essence he's rather simple and stark - a white skinned character with black eyes, hair and clothing. The details of what he wears seem fluid from a google search for details. Some have capes, some don't. Details are obscured by the black. There is a sense of flowing and black and sometimes bare feet.

Planning sketch of Gaiman's Morpheus/Dream


As I started making the doll there was an element in my choices of making it more complex or challenging as well as more interesting and appropriate. I did debate making his helmet but couldn't quite work out how I would do it and although it's known it's not all that iconic somehow.

So unusually as I normally work from basic body, outwards, stage 1 was the coat, which I decided to make in fake leather since I had some! I tried out a new technique for sewing whereby only the shoulders were sewn inside out with the under arm and sides sewn from the outside to stop the ripple effect along the front opening that happens when I sew it entirely inside out. I also decided to try making the sleeves separately. I was as always extremely extremely grateful that it was fake leather and thus didn't need hemming.

Black leather coat for Gaiman's Morpheus/Dream

This was kind of tough to sew with black thread on something shiny. I had to squint a bit without my glasses and in really strong light. I ended up with the sleeves slightly too long so I hemmed them a bit shorter and compensated by trying to make the arms of the body longer.

So yes, then I got to the body. I had a bit of a dither about the hair because I didn't have any black wool or anything I wanted for hair but I decided to hope someone would come through (at the last minute Mum found some) so I made a black hair base with embroidery for the fringe-y bits ("bangs" in American?)

Putting together the body parts and head for Gaiman's Morpheus/Dream

The sketch shows a belt but I got sidetracked by another idea - to give him some sense of flowing, I had some semi transparent black I'd used before which I chopped about with scissors as it wouldn't tear. It couldn't be added without complications before the body was sewn up as it would get in the way of turning it the right way out. So I made the body basically black with white hands and feet.

Then Dream was right sided out and I added the floaty bits. Finally I got to the hair. I couldn't work out how else to do it, so I cut lengths of wool and sewed them on to the stuffed and sewn up doll. In retrospect I should have stuffed but left the top open to allow for ease of sewing down the wool but I think it's relatively secure, so long as you don't really yank at it.

The fun last stage was that I cut the hair too long and then gave Dream a "shaggy" haircut. This was particularly fun because the requestor had asked for "wild" hair.

Final plushie of Gaiman's Morpheus Dream
So it is now complete. Eyes could have been bigger but I can't fix it now. I'm rather pleased with it.

In amusement afterthought as I was making this it occured to me that it resembled Neil Gaiman himself.

I mean dark shaggy hair, mainly black clothing, long coat? I nearly joke tweeted him that I should make an Amanda Palmer to go with but I didn't.


Tuesday, 9 April 2013

This list was supposed to be shrinking!

Only...er some more people asked.

Current list is :
  1. Morpheus/Dream/Sandman
  2. 10th Doctor
  3. Michael Jackson
  4. Darth Vader
  5. Elizabeth from Bioshock or Death from Sandman

May run out of specific materials at some point. Currently I would like someone to donate more black fabric, preferably black felt would be great. Think I'm OK for brown right now.