....yeah I know everyone does it but tough!
History

It all started with this magical object - the Doctor Who quiet book made by Bantam BB for her son. A friend saw it and loved it, I know I do, and she really really wanted someone to make her one. I admit, I could make it but it was really far larger a project than I was willing to take on at that time. Admittedly I had done something of similar scope previous to that for my nephew (I will blog about that at some point), but I just wasn't up for it just then.
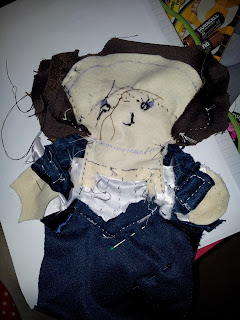
Then my friend found another pattern which calls itself Human Plush David Tennant/Castiel by Michelle Coffee. The scope of this was far more manageable but I did not realise quite what a journey I had begun. More than 14 plushies later, I am now accepting that although I do this for fun there is time and effort involved and I have to charge you lovely people for them.
Cost
If you would like me to make you one the cost is £15.
This is really barely a nod towards the cost of my labour (at least 12 hours) and design as I mostly source my materials for free second hand. It also includes postage (UK only, in the unlikely event anyone outside of the UK wants one, I will discuss the postage with you). I will also pass on to you any costs for major materials that I need to buy from new.
What design can I order?
I will consider any character you can think of, but I don't promise to make any character. You are welcome to order one of the characters I have already made, but be aware they will not look identical. I use what fabric I have to hand, which varies, and I adapt the design to what I have the patience to do at the time. For example I have made the 10th Doctor (David Tennant) twice. They do not look exactly the same.

I prefer to make geeky characters, but as you can see I have also made real people (Elvis, Michael Jackson) and characters I do not know at all.
The ones that come out best have very distinctive dress or look as plushies have simplified features, they are not portraits. I have done characters like Sherlock and Edward from Twilight, but because there is not a lot to make the way they dress distinctive they were not as fun as some of the others. If I don't know the character I may ask you to help me find reference photos or pictures.
Here is the list of every character I have made so far:
- Mal Reynolds
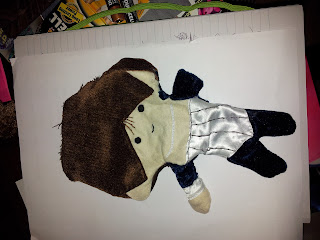
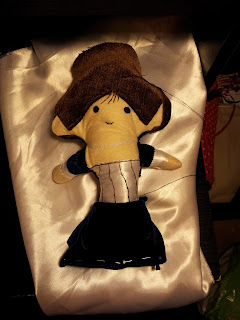
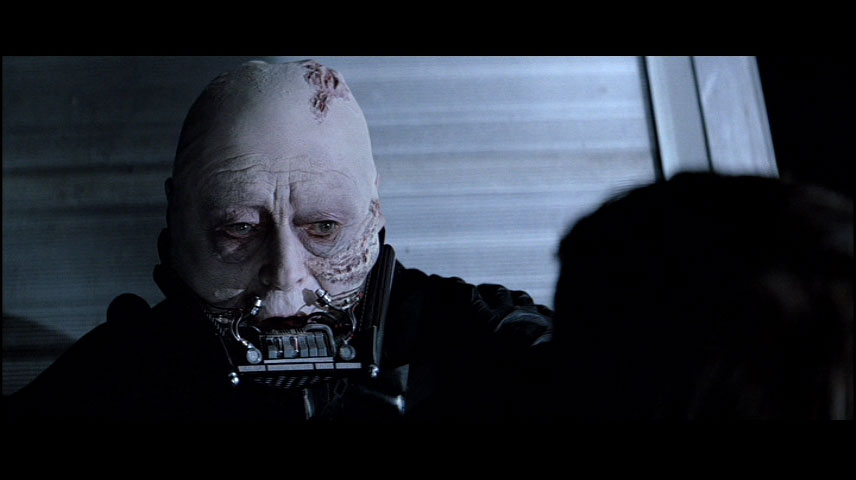
- Darth Vader
- 11th Doctor (Matt Smith - twice)
- Captain Jack Harkness
- 10th Doctor (David Tennant - twice)
- Clara/Oswin Oswald/Dalek
Comics and superhero films/tv
- Clark Kent/Superman
- Black Widow
- Thor
- Loki
- Morpheus/Dream (also resembles Neil Gaiman, twice)
- Harry Potter
- Hermione Granger
- Albus Dumbledore
- Severus Snape
- Elizabeth (Bioshock)
- Doc Emmett Brown
- Marty McFly
- Clara Clayton / Brown
Other assorted characters from books and tv and film
- Babydoll (Suckerpunch - twice)
- Sherlock (Cumberbatch edition)
- Edward Cullen (Twilight saga)
- Elvis (three times in white, navy and black)
- Michael Jackson (Thriller video)
Firefly
Star Wars
Doctor Who/Torchwood
Harry Potter
Computer Games - Bioshock Infinite
Back to the Future movies
Real People
Quality control
Please remember you are getting a handmade object. I am doing this for fun and I am by no means an expert. You will be getting something made with humour and love.

It will not, however, be a perfect, factory made toy, and may not be very durable for small children. Take caution if you want to wash it.

In addition I will try and get character details (mostly) right and if I am not certain about how to make the character best or what fabric to use, I will discuss the options with you.
Good luck and feel free to browse my posts about the plushies I've made.