Showing posts with label film. Show all posts

Wednesday, 27 April 2016

I'm blue da ba dee da ba die

So my latest requested plushie was Grimmjow Jaegerjacquez - a character from Bleach manga. I confess I was not familiar and had to do some research for details and query others.

He's had a variety of outfits but I think this was the one requested.
Grimmjow Jaegerjacquez source image from animeGrimmjow back view
The most exciting challenge for me was the fact that he has a hole through the middle of his body. A fact that reminds me of Existenz (1999) a film where people get a hole in their back and jack into some kind of gaming network.  It's not at all the same but every time I was planning this aspect I kept being reminded.

I was going to photograph the process but as the hole through the middle involved a black tube of felt attached to one side at one point at around the middle of his body... I leave you to guess why I didn't.

Anyway, I was a little nervous because I had to guess how wide his body would be and therefore how long the black tube would need to be but fortunately I guessed OK.  Essentially in order to be able to turn him right way out after sewing the two sides together I had to leave one end free. Once the right way out I could then attach the far end of the tube. Then, to stuff the doll I left a pole through the hole so that it didn't collapse while I stuffed the body.

I can't photograph in a way that shows you that you can see through the hole but it's kind of cool.

Grimmjow stage one - body is complete including "Hollow" hole - front view

Grimmjow stage one - body is complete including "Hollow" hole and 6 tattoo - rear view
The next stage was the short jacket. The description on the wiki says a turned up collar and the sleeves rolled up, white, with black lining.

I'm not good at lining things so I tend to just line each piece and then turn them inside out and attach.
Grimmjow stage 2 - jacket left sleeve complete, right sleeve to be sewn
Unfortunately this meant somehow the sleeves were too exact to roll up but I still like the effect.
Grimmjow Jaegerjacquez complete with jacket
Hopefully the new owner will like it too! They liked stage 1 (without the jacket) so here's hoping.

Friday, 29 January 2016

It's been a long time, we shouldn't of left you

...without a dope beat to step to...

It appears I have not blogged since October. Good grief!

I'm going to throw you a few pics of some plushies I did  a while back.

These two dolls are the school uniform of the children at the school a friend of mine who is a newly qualified teacher. Apart from aiming to get the details right, I decided early on, one of the girls would be black because most of my characters are white and there are plenty of kids at that school who aren't, also she was a sort of homage to one of my friend's daughters who is cute and adorable. I wanted the smile to be clear and her mouth disappeared for some reason with black thread on brown even though her eyes didn't so I gave it a small white line to make it stand out

My friend was very pleased so I'm glad they came out alright. She gave me a book token and some chocolate. Bless.

Boy in school uniformGirl in school uniform

Girl and boy together in uniform

I also made a Furiosa doll for a friend. The tricky bit was the arm, which I made out of pipe cleaner. I'm not very patient so rather than going out to get the right colour I coloured in with felt pens the yellow pipe cleaner to make it dark metal grey.
Colouring in Imperator Furiosa's arm
Similarly for her oil slicked shorn head, I coloured in for a looong time the pink fabric for her head. I really wished I'd used embroider but that would have been equally long.

The parts of Imperator Furiosa all laid out before sewing

The basic doll was made first then I sewed on her metal arm.
Imperator Furiosa completed

My friend and customer was very happy.

I have got some update on the Nursery rhyme book. WITH PICTURES, of actual sewing done. But I'm too sleepy to do it now.

Wednesday, 24 June 2015

Where do we go from here?

I realised I never posted any pics of Babydoll mark 2

There aren't many pics but here it is!
Babydoll mark 2
She was a second version for the same person who wanted one for herself and one for her partner.

Anyway as mentioned previously I have been asked to make

  • Imperator Furiosa
  • 2 kids in a school  uniform
  • Delorean - still no idea when I'll do that one
  • I think I may have promised a Harley Quinn and possibly Rogue and possibly Scarlet Witch...
That's where we are on projects anyway

Tuesday, 30 December 2014

A long time ago on on the internet

(title to be sung to the tune of  'Long time ago in Bethlehem')
....lwell it IS still Christmas, until the 6th January darn it!

Anyhoo a while back I offered to cheer someone up with a plushie of their choice....they asked for an inanimate object. I um....only make people but I said I'd think about it. They had asked for the Delorean from Back to the future. Ummm yeah. I can do that? I think?

Delorean from back to the future, wheels horizontal, doors closed
Delorean from back to the future, wheels vertical, doors raised.
That's um going to be interesting

So it's Christmas, right, I'm at my parents for a long winter's hibernation. The last time I had a long stretch at my parents with not much to do it was before my nephew and I spent the time working on a special cloth book for him so this year I thought I could start some work on my more complicated projects.

Planning in paper

I don't do a lot of this with ordinary people plushies. I do sketch a bit, specially if they are complicated but often most of it is just remembering minor details of the clothing and colour of the cloth or how many separate bits there are.

As you can see from the dalek, even with complicated things, if I think I can work it out without an advance plan I often don't bother much. This time I was going to need to plan seriously as the shape was significantly more fiddly with a lot of decisions.

One of my first decisions was whether to try and make it hollow and able to accommodate the Marty and Doc Brown. This sadly was almost immediately abandoned as (a) I didn't have a plushie to hand to work out the sizing and (b) it would just be too big and I didn't have the patience.

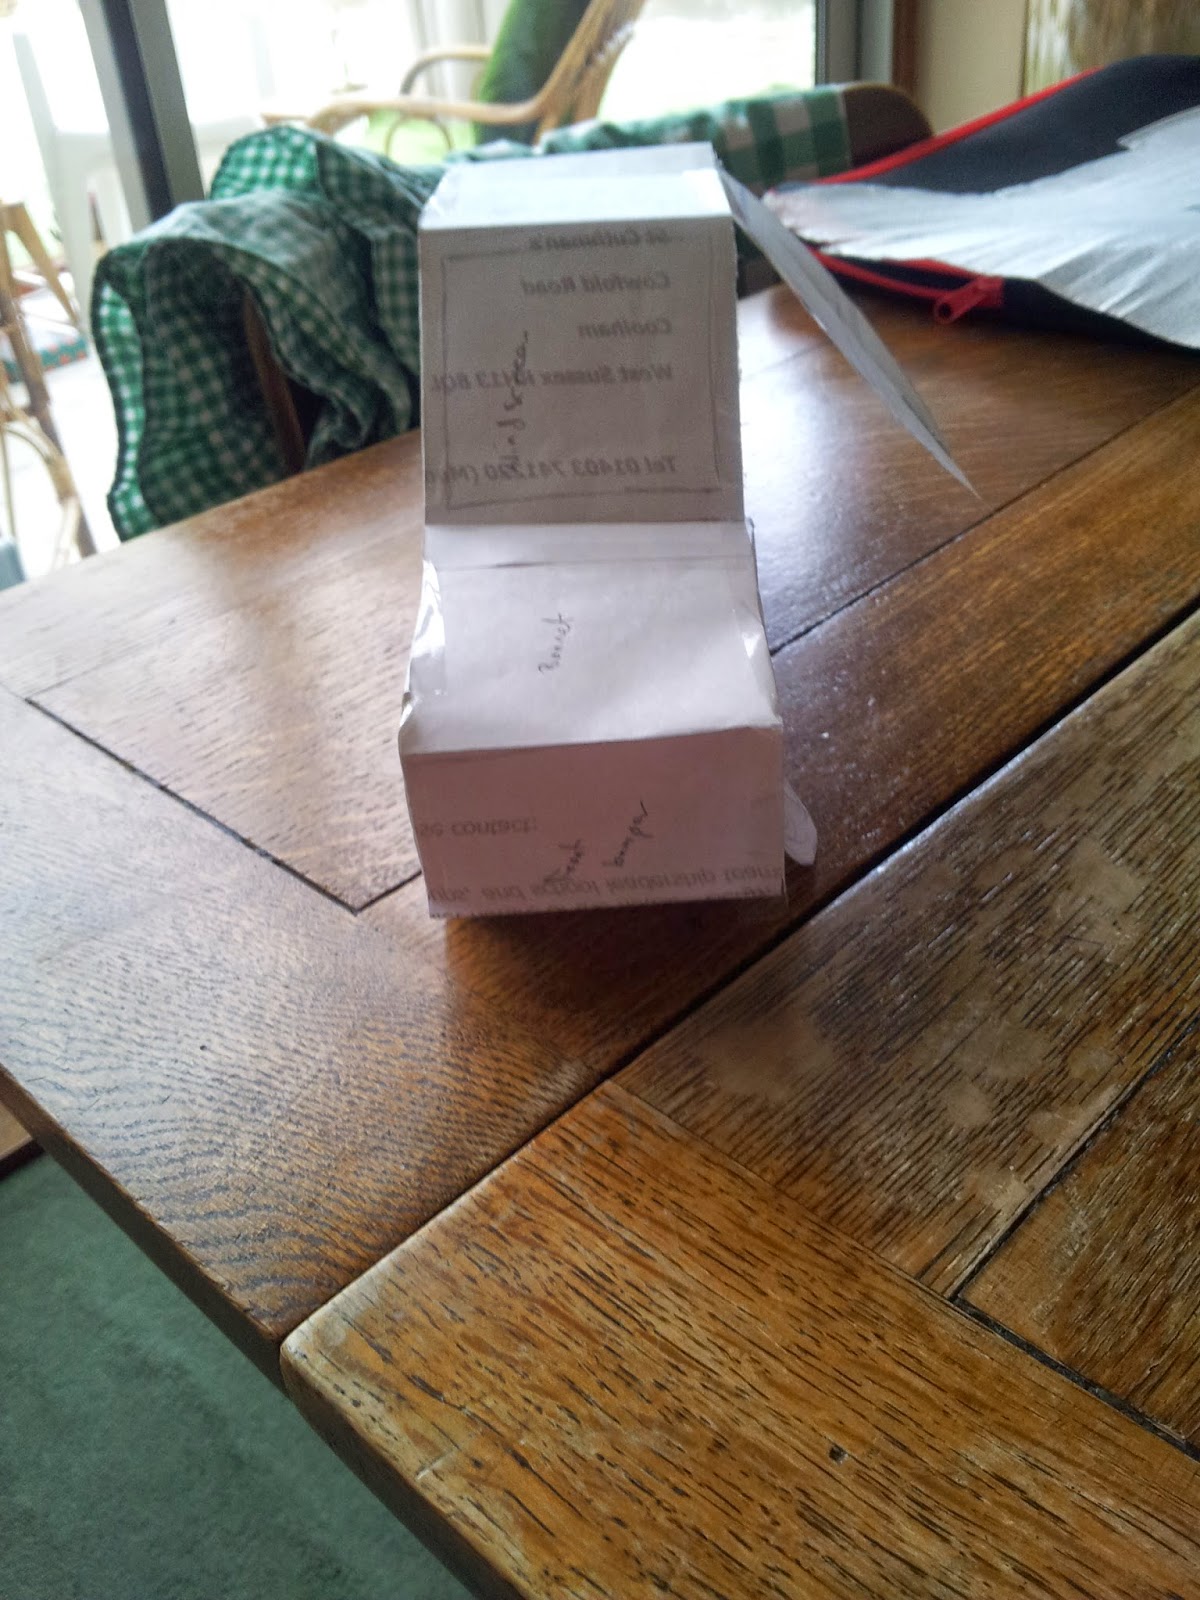
I then tried to make a rough pattern in paper. for the main shape. If I were really trying to make a paper delorean I would have put tabs but what I wanted to create was a pattern for the cloth so I just taped the parts together.
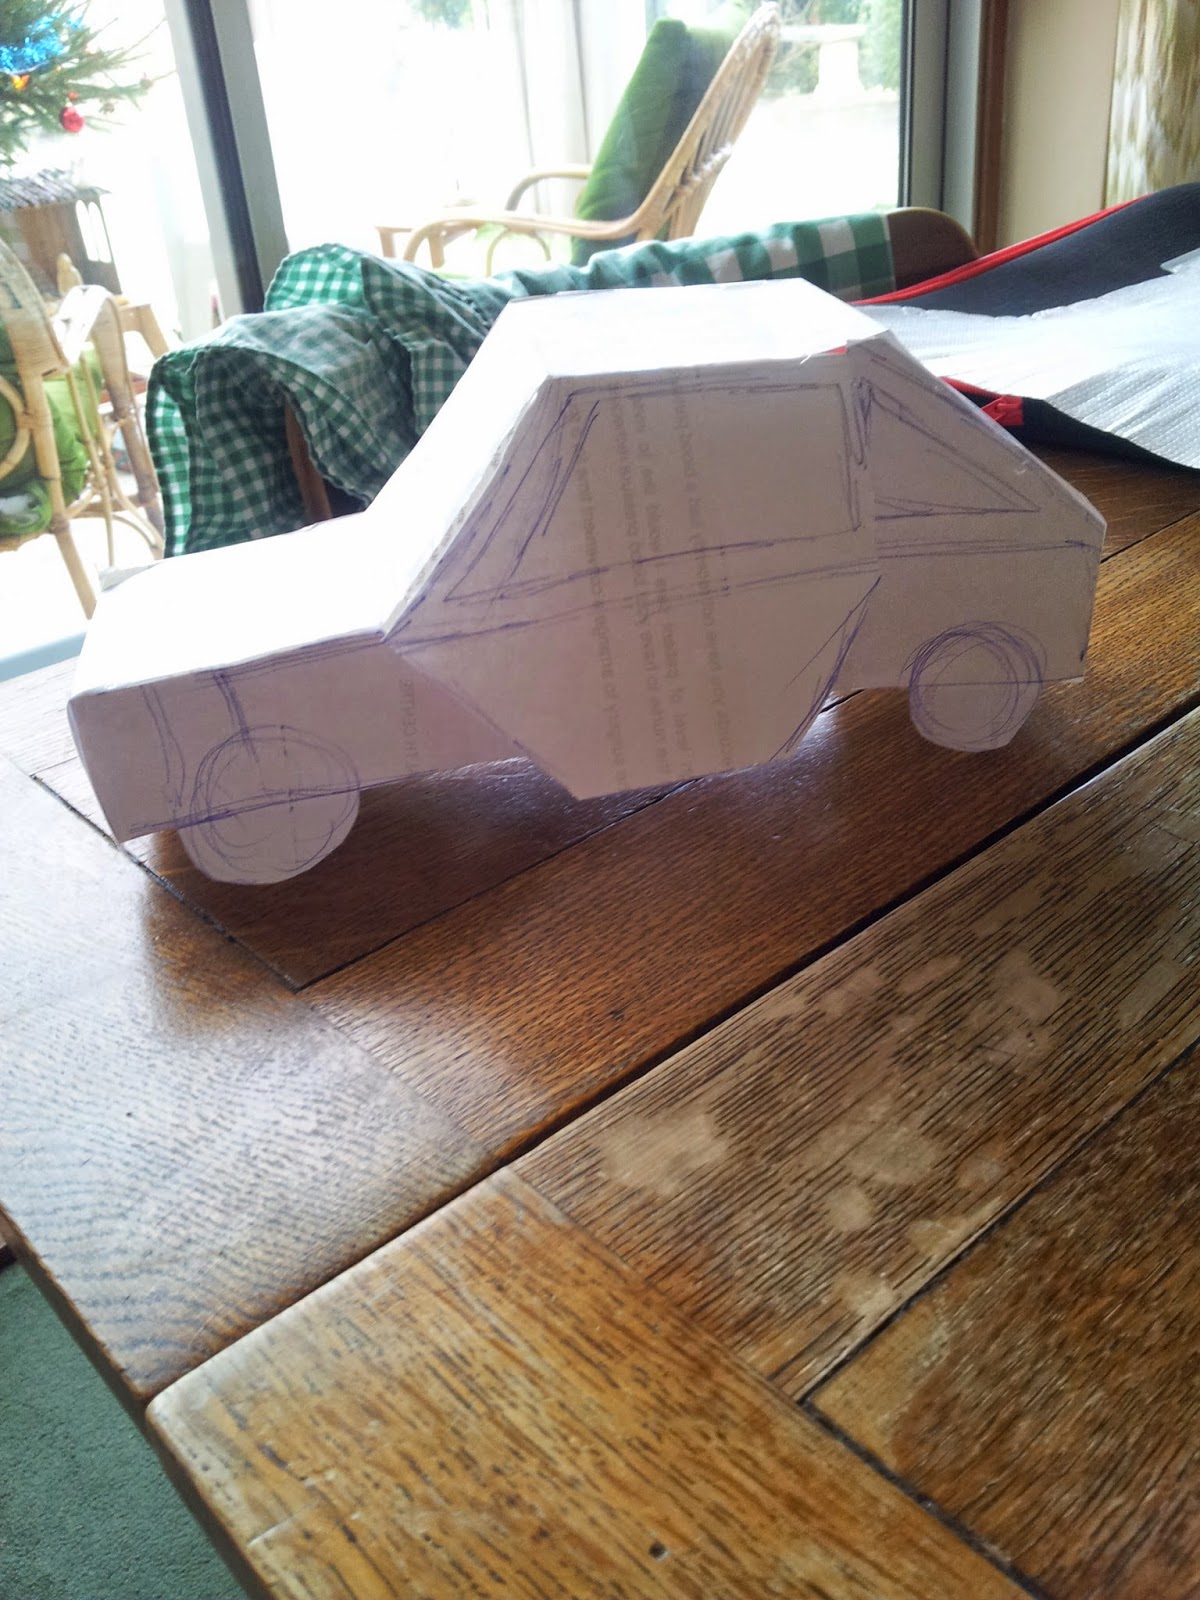
Delorean paper model, side view
Delorean front view holding right door open
Delorean front view right door slightly open
Essentially my plan is two side pieces and a long piece wrapping round the outside, with the wheels as added extras sticking out.

One of the things I can see from constructing the model is that it needs to be wider. The long winding piece will need to be probably twice as wide. I can also see that the door is wrong, and looking at reference pictures I can see what's gone wrong, the door doesn't flap up from the frame of the car, it flaps up from a bit that runs through the middle of the roof.

I think there will be an internal space with seats but the bonnet and boot blocked in and stuffed. but I haven't worked out how to deal with the windscreen - opaque piece of fabric in "blue", clear plastic (NB where would I get that, how would I sew it in place?), or just empty space.

I will probably also be using some pipe cleaners to create some stronger framework, probably not throughout but just around the empty space of the ?cockpit? drivers area? WHATEVER that space is called. And will probably need some interfacing throughout to give it some way to be less curvy and more blocky like a car.

The seats are definitely going to be added in afterwards created separately.

When, when, when, little hen will you make me a d'lorean for my tea

Well I know I've put this off for a while but there are two little people plushies I owe really before I get to the Delorean. Namely:
But I think that after that I will be able to get on to the Delorean probably. Another factor that will slow me down is I don't have an awful lot of grey fabric. I did have for ages but it got used up making the dalek so I'll need to buy some. Plus some significant amount of interfacing. I also want some for another project so that's not going to be a problem.

Sunday, 21 December 2014

Sinistral dexterity and all that

I'm a bit out of sequence but what the heck. So I made a Hermione, the latest in a long line of Harry Potter plushies (well, long enough for me. So far : Harry Potter, Albus Dumbledore, Severus Snape).

Hermione demonstrates the two rules of asking me for things:

1. Don't wait yourself till I'm free, you may never notice when I am, I'm always faffing about the place.
2. Never say "whenever you're free" because that may take forever and never happen


As a result I'm afraid I was asked for this some long time back and only now got round to it. And when I say some time back I mean a long while back. Not sure when it was actually.

Anyhoo I didn't put a ton of thought into it and basically riffed off the Harry Potter I made some time back.


I did originally try and make her hair just from cloth as I did with Thor. Unfortunately it mostly came out wonky.

Which I then had to fix

I then made some debate about whether I could find a way to make curly hair or curl some wool to make it curly and gave up, she was going to have straightish brown wool hair bought for the purpose and sewn in place.

I always love cutting the hair to the right length.


Final detail was the wand, which, with foolish haste I accidentally sewed to the left hand.


Pretty sure she's not a lefty like me.


Hermione threatening Draco with her wand in her RIGHT hand

The wand was a random colour wrapped in brown wool as I didn't have a brown piece of pipe cleaner. Owner seems happy though.

Whoops - That thing where you've missed a bit

In writing my recent blogpost I realised I had never written up about making Clara Clayton/Brown. I can't reproduce most of my thoughts about the process at such a remove. I did have some debate about what she should be wearing but eventually settled on this outfit, partly through the exigencies of what I had available, fabric-wise.
Close up of Clara Clayton's outfit from the waist upClara Clayton's full outfit

It was a comparatively simple basic design, as I now do as standard, the basic doll is made and the skirt is sewn onto it once the main plushie is sewn and stuffed.

The only special part of the design from my part, was to include a bustle, which sadly I have not photographed. I put some addition padding on her posterior as mostly the plushies have no bottom to speak of. Bustles always make me think of my Oma, who had to wear one, and who told me people were very jealous of her posterior because it meant she didn't have to wear much of a bustle(!).

Clara Clayton plushie without hat

The other fiddly part was the hat. I made a roll of filler out of some leftovers from deconstructing the shinpads to make the Wonderwoman bracers, and then covered it with ribbon and did something similar for the brim, then added the ribbon. I had some spare around and this meant the new owner could have two alternative colours as they chose. The hat was then sewn onto the head. It is not removable.
 
The final touch was a small bit of silver decoration in embroidery for the buttons and edging. A sensible woman would have done this at an earlier stage like Clara's frizzy fringe, unfortunately I'm not a sensible woman so I did it pretty much last.


As far as I can tell the new owner is very very happy.

Wednesday, 24 September 2014

Baby got back....

Hello Babydoll from Suckerpunch how are you today?

Fine thanks, how are you?

Well I finished the secret commission the other day so now it's your turn! A friend wants a plushie version of you cos you're one of her cosplays.

The main reference shots I used were

Suckerpunch movie poster showing Babydoll Image from Suckerpunch movie of Babydoll
Plus this image of just the costume for Babydoll

I planned out the basic layers. The base doll just has a blue top a very small midriff and blue shorts to go under the skirt. The sailor collar went over the top sewn on separately, and the pigtails were also sewn on separately as was the skirt. Last touch was the harness.

I don't know why I like these inside out shots but I guess for me what I like about them is how it doesn't look like anything and then it's turned out the other way and it really has some shape.
Babydoll plushie early stages, inside out waiting to be turned out the right way
I had thought I had a shot with no skirt and no sailor collar thing but I didn't apparently. I also didn't take a shot at the point on turning the doll right side out I discovered her legs were just too long and I had to shrink them a bit.

Anyway, after I'd done the basic doll I then sewed the skirt. I did debate actually ironing box pleats but decided in the end that the better part of valour was faking it with embroidering. So here you go, for some reason I don't fancy right siding it up.

Babydoll plushie with skirt on, but no sailor collar or pigtails
Once the skirt was on I made the pigtails and sewed them on, and then made the sailor collar. I used the blue stripes to sew down the hems out of laziness.
Babydoll with part finished sailor collar, skirt and pigtails attached
Just at an unfortunate moment towards the end I ran out of blue embroidery thread with a mere inch or so to go. It was killing, but I survived until I could retrieve some more from Mum's house.
Babydoll's collar in progress
I then made the holster/harness and the plaited rope strap. I only sewed down the sailor collar after the holster was sewn onto the doll. It is not removable.
Nearly finished Babydoll plushie, harness is complete, sailor collar is still waiting a few stitches, front view

Nearly finished Babydoll plushie, harness is complete, sailor collar is still waiting a few stitches, back view
When I finally go the last bit of blue embroidery thread I went a bit mad and wrapped it up and posted it off without taking a final complete picture. I hope the owner will do that for me!

All in all I'm pleased how she came out. She's very cute and I like how well the details turned out.

I've just remembered someone asked me for a Delorean plushie...dunno if I'll get to that.

Monday, 18 August 2014

Belatedly things get a bit stormy....

From one deity (Loki) to his brother, Thor, God of Thunder.

I prefer reference material that goes back to the source the person wants - in this case the films, but sometimes it's hard to get all the details. And to get them all in one image.

I found this image which seemed from other pictures to have a lot of useful details visible.

Image showing all the details of Thor's movie costume, not clear what the source is, but verifiable against other images
The first thing I realised was that there were a lot of details that I couldn't possibly hope to replicate in a plushie both due to scale and the style of the object. In addition I didn't have much actual silvery colour but I did want some metallic elements, so I had to decide how to use it to best effect.

What I aimed for was a general impression of the costume rather than a replica.

In some ways the costume was simpler than Loki's as there was not an extra coat. In essence you have Thor's suit and boots, and you have a cloak, as opposed to Loki's suit with tunic, coat and cloak.

In addition I had wanted to make some proper flowing hair as I had with Loki but I never got round to sourcing yellow wool so I just stuck with cloth. I liked this goldy cloth though so it came out alright even if it was a toughie to hem for the beard.  I didn't have any bits large enough to do it in one piece but I kind of liked that effect as it sort of felt like different swathes of hair.

Embroidering Thor's eye in his face, the hair and beard are already attached

The first stage of Thor was putting together all the different bits for the body without cloak.

Thor's actual sleeve has a sort of mail bit and a cuff that is smooth. A plushie's arm is too short for that so I just gave him a silver sleeve.The next bit I added on was the belt and the front details of the armour.
The basic front and back of the head all sewn together into one piece, but not to each other. Also the same for the body

Once I completed the basic Thor front and back I hemmed up the cloak and created two small silvery bits to attach the cloak to Thor. The cloak is not detatchable and can't be removed.
Basic Thor completed plus cloak
I had always planned to do a helmet but I didn't have enough silver for the whole thing. or to cover it entirely in silver.
Thor's helmet, the movie prop on display

So I decided to do it in grey felt. However while I wasn't sure at first about using the left over pieces to add silver details, I decided I had enough, so I made the wings on the side completely silver and used silver pieces at the front and over the back and top to give some extra feeling of silver without having to cover the entire thing. I also added some paper between the felt and silver to the wings to give them some stiffness.
Completed Thor doll with helmet - side view
So there you have him. The new owner thinks he his ace! I would have liked to have made a hammer but I didn't have any feelings about how I wanted to do it, and the owner has a little hammer keyring which fits! Plus he seems to look like a blond bearded friend of mine! No not Chris Hemsworth, I'm not connected to famous people. He's an English teacher.

Completed Thor doll with helmet - front view

Sunday, 1 June 2014

Making things is magical

I can hear the HP theme already....

So I made a Dumbledore. In the end, that person, who had already ordered a Snape (I finished that a while back), I gave her the Harry Potter I made aaaaaaages ago as the person who ordered that  was an ex colleague, and wasn't paying for the privilege and was never going to visit again to collect him so I figured he was mine to pass on to a loving home. That makes a nice trio to have.

Dumbledore has had 2 incarnations in the movie, who dress very differently depending on the actor playing him.

I gotta say the second guy Michael Gambon may have been fun to watch but his outfit was not all that thrilling and he somehow came off to me as more of a Gandalf type with all the greys.

Michael Gambon as Dumbledore (and Gandalf lookie likey)
I did debate making him but with the customer's permission I went ahead with a more Richard Harris influenced creation.

Richard Harris as Dumbledore

A lovely reds and brocade look.

I didn't quite have brocade but I had some reddish, if not maroon coloured fabric.
The first stage involved the basic body of the plushie and the under fabric for the hair, which I planned to add to with wool. I decided his legs should be grey for want of any other better choice.

Dumbledore plushie early stage, no skirt on his under-robes, and his hair is a bit minimal
 Next stage was adding on some proper hair and I decided to go all out and give him lots and lots. It's a thin white wool if you're interested.
Dumbledore plushie as I sew on white wool for his hair and beard
At this point I needed to sew on the bottom of his robes so he had to have his hair tied out of the way. I'm sure NORMAL people would have done this before the hair, but no-one ever called me normal!!

Dumbledore plushie hair is done and tied out of the way while I pin on the skirt of the under-robes
 Next stage was his robes. This is a sort of rich red velvet.
Dumbledore plushie with hair and over robes completed
 I added a little bit of detailing by backing some lace ribbon with some yellow ribbon and adding it to the edge.
Close up of the lacey edging to the over robes of the Dumbledore plushie
 I did a similar process to make the edge of the hat.
Dumbledore complete with hat and wand
 I did debate cutting down his hair and then decided I liked it long. Fortunately, so did the customer!