Showing posts with label comic. Show all posts

Wednesday, 27 April 2016

I'm blue da ba dee da ba die

So my latest requested plushie was Grimmjow Jaegerjacquez - a character from Bleach manga. I confess I was not familiar and had to do some research for details and query others.

He's had a variety of outfits but I think this was the one requested.
Grimmjow Jaegerjacquez source image from animeGrimmjow back view
The most exciting challenge for me was the fact that he has a hole through the middle of his body. A fact that reminds me of Existenz (1999) a film where people get a hole in their back and jack into some kind of gaming network.  It's not at all the same but every time I was planning this aspect I kept being reminded.

I was going to photograph the process but as the hole through the middle involved a black tube of felt attached to one side at one point at around the middle of his body... I leave you to guess why I didn't.

Anyway, I was a little nervous because I had to guess how wide his body would be and therefore how long the black tube would need to be but fortunately I guessed OK.  Essentially in order to be able to turn him right way out after sewing the two sides together I had to leave one end free. Once the right way out I could then attach the far end of the tube. Then, to stuff the doll I left a pole through the hole so that it didn't collapse while I stuffed the body.

I can't photograph in a way that shows you that you can see through the hole but it's kind of cool.

Grimmjow stage one - body is complete including "Hollow" hole - front view

Grimmjow stage one - body is complete including "Hollow" hole and 6 tattoo - rear view
The next stage was the short jacket. The description on the wiki says a turned up collar and the sleeves rolled up, white, with black lining.

I'm not good at lining things so I tend to just line each piece and then turn them inside out and attach.
Grimmjow stage 2 - jacket left sleeve complete, right sleeve to be sewn
Unfortunately this meant somehow the sleeves were too exact to roll up but I still like the effect.
Grimmjow Jaegerjacquez complete with jacket
Hopefully the new owner will like it too! They liked stage 1 (without the jacket) so here's hoping.

Monday, 18 August 2014

Belatedly things get a bit stormy....

From one deity (Loki) to his brother, Thor, God of Thunder.

I prefer reference material that goes back to the source the person wants - in this case the films, but sometimes it's hard to get all the details. And to get them all in one image.

I found this image which seemed from other pictures to have a lot of useful details visible.

Image showing all the details of Thor's movie costume, not clear what the source is, but verifiable against other images
The first thing I realised was that there were a lot of details that I couldn't possibly hope to replicate in a plushie both due to scale and the style of the object. In addition I didn't have much actual silvery colour but I did want some metallic elements, so I had to decide how to use it to best effect.

What I aimed for was a general impression of the costume rather than a replica.

In some ways the costume was simpler than Loki's as there was not an extra coat. In essence you have Thor's suit and boots, and you have a cloak, as opposed to Loki's suit with tunic, coat and cloak.

In addition I had wanted to make some proper flowing hair as I had with Loki but I never got round to sourcing yellow wool so I just stuck with cloth. I liked this goldy cloth though so it came out alright even if it was a toughie to hem for the beard.  I didn't have any bits large enough to do it in one piece but I kind of liked that effect as it sort of felt like different swathes of hair.

Embroidering Thor's eye in his face, the hair and beard are already attached

The first stage of Thor was putting together all the different bits for the body without cloak.

Thor's actual sleeve has a sort of mail bit and a cuff that is smooth. A plushie's arm is too short for that so I just gave him a silver sleeve.The next bit I added on was the belt and the front details of the armour.
The basic front and back of the head all sewn together into one piece, but not to each other. Also the same for the body

Once I completed the basic Thor front and back I hemmed up the cloak and created two small silvery bits to attach the cloak to Thor. The cloak is not detatchable and can't be removed.
Basic Thor completed plus cloak
I had always planned to do a helmet but I didn't have enough silver for the whole thing. or to cover it entirely in silver.
Thor's helmet, the movie prop on display

So I decided to do it in grey felt. However while I wasn't sure at first about using the left over pieces to add silver details, I decided I had enough, so I made the wings on the side completely silver and used silver pieces at the front and over the back and top to give some extra feeling of silver without having to cover the entire thing. I also added some paper between the felt and silver to the wings to give them some stiffness.
Completed Thor doll with helmet - side view
So there you have him. The new owner thinks he his ace! I would have liked to have made a hammer but I didn't have any feelings about how I wanted to do it, and the owner has a little hammer keyring which fits! Plus he seems to look like a blond bearded friend of mine! No not Chris Hemsworth, I'm not connected to famous people. He's an English teacher.

Completed Thor doll with helmet - front view

Thursday, 2 January 2014

I STILL aten't dead - but Loki is done and dusted!

I stayed up all night to get Loki....or rather I dropped everything to finish Loki in time for Christmas as he's a present from one friend to another.

Loki's costume as I mentioned between the Thor films and Avengers and variants within is a complex costume. I am endlessly grateful to a friend of mine who having cosplayed a Loki had lots of reference pics to help me, and as another friend had made the costume I loved that I was using Loki cosplay offcuts to make a Loki plushie.

I essentially decided to go with a version of his golden-y armour to add a bit of extra bright to the other dull colour palate of dark green and blacks.

Loki scale doll model

I had to plan how I was going to do it layer by layer as you can see from the drawings

Loki body / bottom layer plan of plushie Additional planning sketch of Loki's underneath tunic Loki tunic coat planning sketch for details Loki final layer cloak and helmet planning sketch Planning sketch of Loki's staff Final design pattern for Loki plushie
I had a bit of time dithering about fabrics because although I wanted to use some of my fake black leather stash I just didn't fancy sewing too much fake leather. In the end I decided this Loki would not have leather boots as I just couldn't face an almost entirely leather base body.

Fabrics during planning of Loki creation
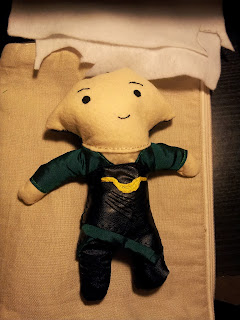
Once I started making the basic body it was fiddly with several different fabrics coming together. I am always adapting the pattern but I'm also very forgetful of things that don't work.
As you can see here I forgot quite how to get the hair to come out above his face properly as I had been distracted by the slicked back seal like quality of Loki's hair in the movies.
Loki plushie came out looking bald not slicked back.
Initial basic Loki plushie - hair has not come out right
This then left me with essentially making a cap of hair to fit over the top and sew down to add to his hair.
Loki plushie with extra hair stage 1 Loki plushie with added hair stage 2
That being more or less sorted I headed on to making the coat. I still wasn't entirely happy with the hair though. Although I always regret it while I'm using it I really wanted to make the zip like edge of Loki's coat using my metallic gold thread and I like to think it came out pretty darned well.
Loki's coat adding zip like edgingLoki in the movie, head close up showing edge of the jacket with zip like effect
That being said the coat was made of a thicker fake leather than the basic body's tunic meaning it was really really annoying to sew.
Loki plushie the first stage of coat
I also carefully lined the coat only to remember he has 3 tails and had to unpick the side stitching and cut 2 v's in the back to make the three tails. Sadly after all that effort I didn't photograph that particular detail.

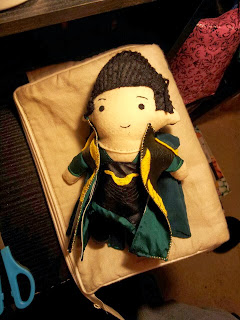
I then made the cloak. Before I moved on to make the helmet and staff I started to dither about the hair and consulted friends about possibly adding some thin wool so he had those sort of rats tails under his helmet. With at least one friend's affirmative I went ahead. As I sewed each one down individually it has come out looking a bit like braids but I don't mind it much.

Loki plushie with coat and updated hair with wool Back view of updated plushie with wool hair addition
The final details were the helmet and staff. I really wanted to make the pointy back shape of the helmet
Loki wearing helmet in the film
But once I'd made the helmet, sewing a ridge for the pointy-ness just didn't work. Then I went on to the staff.
Cosplayer's replica staff
I originally planned to make it with just a few bits of pipe cleaner in yellow and grey and some blue cloth. But it didn't look all that great. I can't find any photos of it when it looked like that.

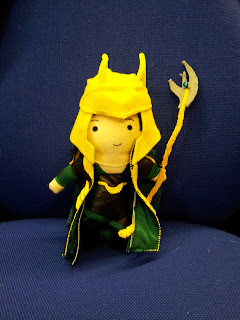
So I kept pipe cleaners for the basic staff, but used some felt sewn to a couple of layers of paper for the knife blades and scammed some blue beads off a friend for the jewelly thingy. With that it went off in good time for Christmas present gifting and both the person who had requested it and the recipient appear to like him very well.
Completed Loki and staff

But what about the ALPHABET?

What? An alphabet you say? No idea what you're talking about. OK OK I'm kidding. I'm still working on it after my brief hiatus but I'm at a dull stage. I'm making all the backs. There's not much to see as such.... I'm up to letter R and they're looking spiffy.

Here's a pic of it hung up at my parents' house when I'd got as far as O.

G[r]eek Alphabet wall hanging with the completely finished letters at that stage A - O

Sewing through the tough plastic-ky velcro strips has necessitated some new tools - rubber thimbles. They don't stop needle pricks completely but they do allow gripping and give some good protection, plus they're slightly warming! They look a bit weird though. I am however glad for the tip from a friend who suggested them.
Perils of sewing through velcro - the need for weird purple rubber thimbles

Sunday, 10 November 2013

I aten't dead

Alphabet News

Z is for what exactly?

I know what you're thinking, where the frak is the letter Z for Zaphod Beeblebrox and well, you'd be right I haven't posted it yet. Stuff happened and things, things also happened. I reassure you dear reader, I have completed Z. In fact I've completed another of the extra letters. As part of being considerate and maintaining my friend's privacy over her child, I have decided I won't be posting any of those letters up. Although it is doubtful anyone could guess their name and surname just from seeing 3 extra letters I don't wish to run that risk.

Overall project progress

Further news - I've finally got all the velcro I need for the sticking up, and have started working on the attachment. The fuzzy half of the velcro is pinned in place on the backing cloth and my lovely Mum has attached a pole to the top.

I've even started sewing on the first back of a letter. I decided I would die of boredom if I made all the backs at once and then sewed them all on. So I will be making one back at a time and then sewing it on one at a time. This means that the letter A is almost completely done, velcro and all!!!! Wooo!

New plushie on the horizon

So someone asked me to make a new plushie, and not any old plushie........it's....erm Loki from Thor and Avengers movie.

I'm simultaneously very yay and a bit argh! Panic!

Today I thought I'd start working out what needs to be made and in what colours, and as always I was bemused by costume variants both within movies and between movies.

Clearly he will have a helmet. With horns. Obviously.
But then there's
  • cape/no cape variants
  • armour/no armour
  • two different staves
    and
  • various shoulder pad combinations.

 Obviously my plushie will not be a perfect copy of any of these outfits. I'm not made of magic people!

Currently my plan is :
  • Basic body of plushie will have the tunic that sort of has a v cutout on the front
  • Coat with no sleeves over the top lined with green mid calf length
  • Cape attached to the coat with no sleeves in green

I can't work out if I will be putting the goldy armour on the coat or not but if I don't it will be quite dark. That's partly why I'm doing the cape. He wears a lot of black.

Anyhoo I will be asking my lovely friends who made a full scale femme version of the costume to help out and advise!

Links for reference

Loki cosplay tumblr
Loki cosplay photobucket picture refs

Thursday, 10 October 2013

G[r]eek Alphabet : W is for Wonder Woman

Some of you may know I've had some concern and care to make sure there is decent female representation on my alphabet, but we're coming to a small concentration now with Wonder Woman followed by, well, you'll see soon enough.

Anyhoo, first realisation was that the basics of the costume have varied a lot and so have the specifics.

Picspam alert!
Wonder Woman - possibly Golden or Silver age illustration More recent Wonder Woman comic book cover with lightning
See? I'm limiting myself a bit these days

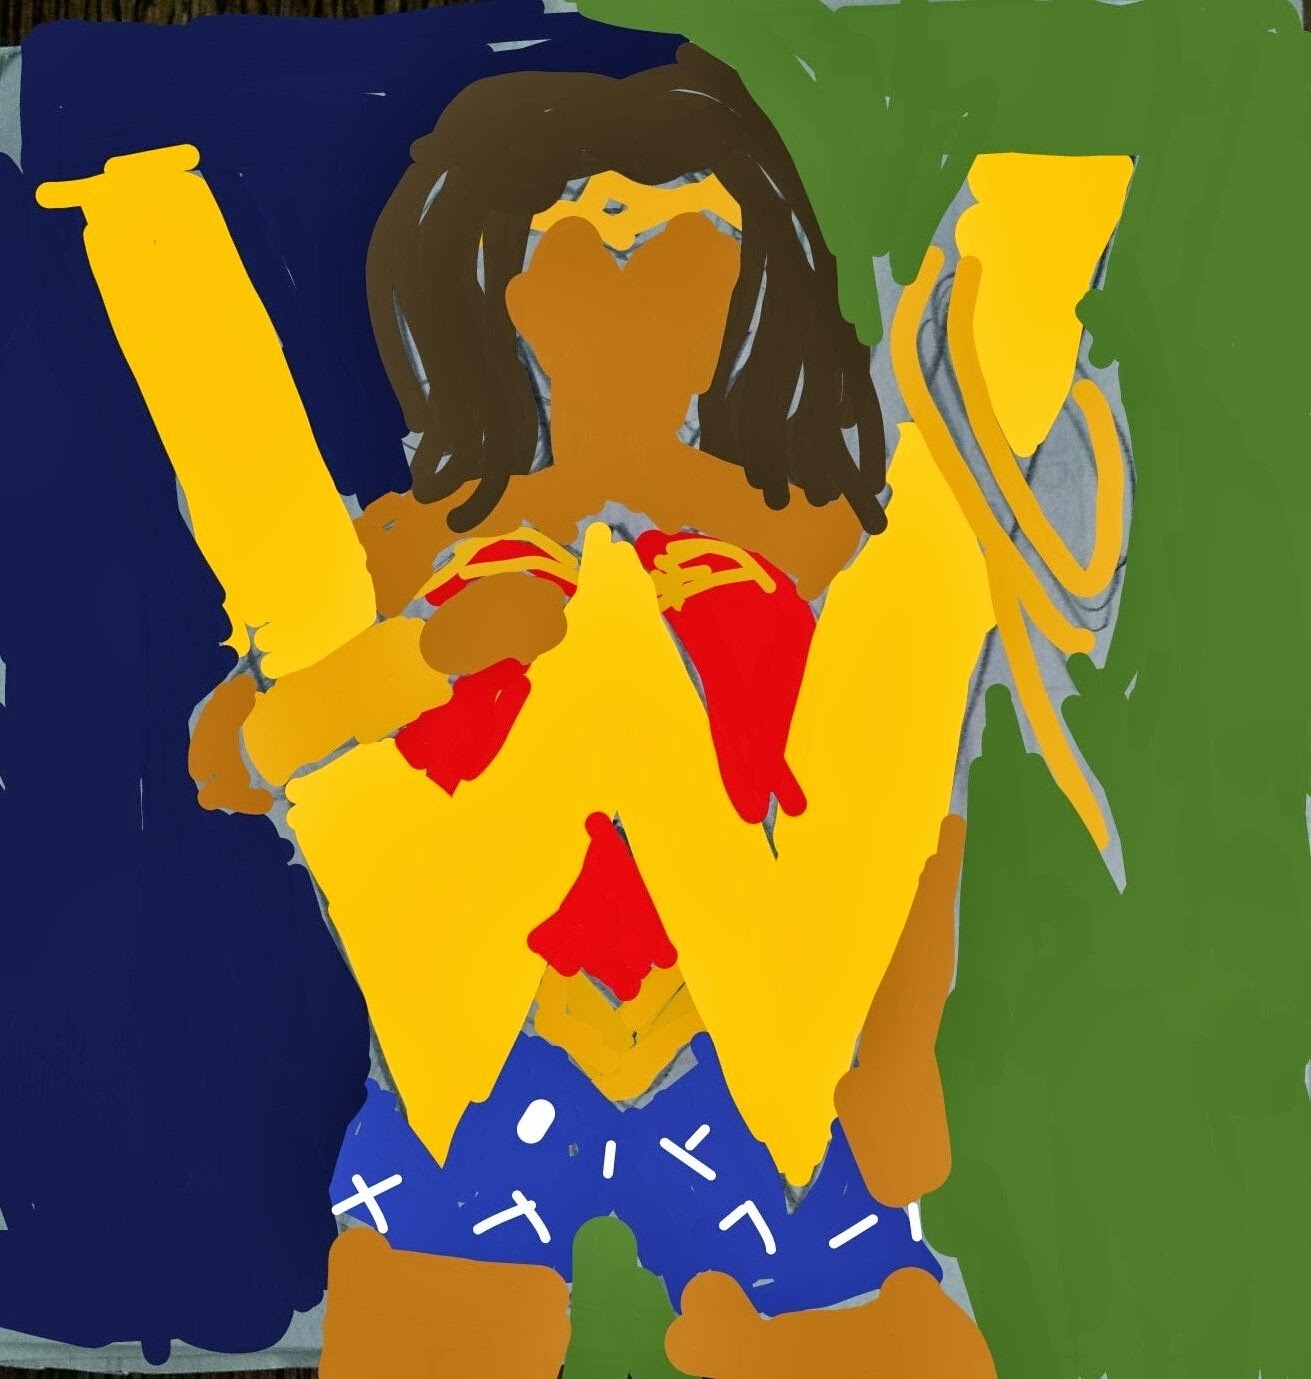
Anyhoo, my first indecision was the background colour. Initial plan had been green like F, but I was debating dark navy blue, like the Tardis letter T. But I wasn't sure. I wanted to have a play while at work so I used my PicsArt App to draw onto the photo of the design to test out these options for contrast and design.
Colour sketch done by drawing on photo of the design using PicsArt app
Although I like the blue and it would have been more of a piece, I decided that actually green would make the design pop a bit more. I also tried out 2 fabrics of green before sticking with my original choice. For this reason I made most of Wonderwoman as a single separate piece so I could lay her out on the two colours of backgrounds - a bit like with Icarus for the letter I (although that was positioning not about background testing).

Wonder Woman's hair and body pieces sewn together so she could be "screen" tested (test out different background fabrics)

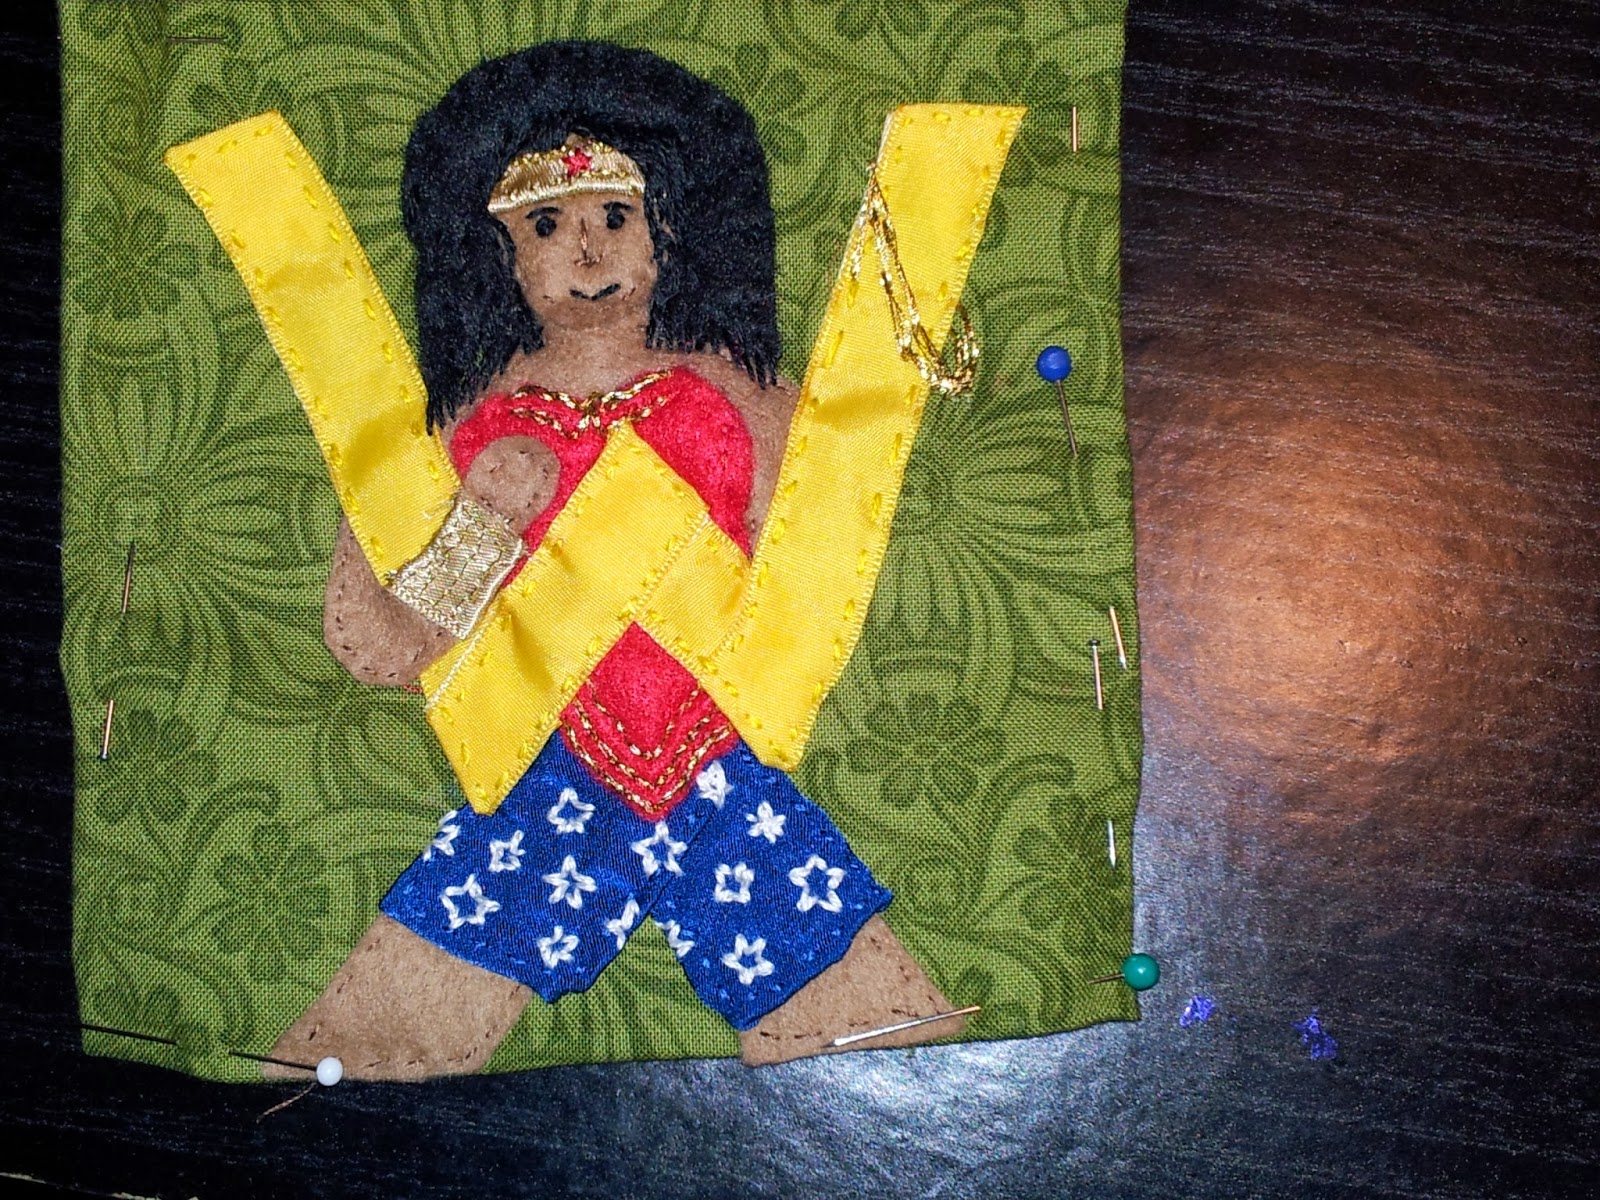
As we've mentioned I just went with original green.  From that point it was pretty quick. I sewed down the W through Wonder Woman as part of sewing her in place. The yellow was an obvious choice for the W - to echo the gold on her costume.

Sewing down the yellow letter W

Then I finished off the details. Cuff got sewn on, headband got sewn on, Shorts got sewn down, and the decorative embroidery - red star in the headband, gold detailing to corset, stars on the shorts all got added. Late on due to some slight shifting of fabric during sewing I found the neck had got a bit rumpled so I put some stuffing in behind the neck and shoulders  (and face) to disguise it.

Wonder Woman and W mostly sewn and finished.

Belatedly I realised I'd missed some tiny bits sewing (under her left arm) and not sewn in the magic lasso of truth! Can't leave that out!
W is for Wonder Woman complete

I am a huge fan of this character and I love that her origin story (not comic book) but her creator, is about a male feminist's determination to give girls and women a good role model!

In my head as a classicist she gets crossed with Athena who started our alphabet and they have their similarities as Greek women who are wise and warriors.

Sunday, 11 August 2013

Is Neil Gaiman really The Sandman?

According to a friend, also the housemate of the person who previously requested the Sandman, my plushie looks like Neil Gaimain. I suppose he is pale with straggly hair and wears a lot of black. But I can't imagine he goes barefoot or wears a black onesie.

Anyway apparently a second copy was required to donate to the man himself at a signing, so very much at the last minute I started making him. I didn't have the particular black I wanted for his body but fortunately with no time to spare I found I had enough of some black to be the body and to be the fabric under the hair.

 I was also out of white felt so after some debate and query with the requester I used some white fabric I had to hand which was slightly heavy but not too bad.

Making was remarkably easy considering I'd not made one for a while but I'm still searching for a better solution to fixing on the hair. Another friend suggested I should have sewn it into the top of the head seam. I guess I could but I'm not convinced yet.

Anyway. In order to get the hair right I basically cut it far longer than needed and then give it a hair cut. Before the haircut this is what it looks like:

"Rastagaiman" Sandman plushie pre haircut and prior to the jacket being completed.

I then cut the hair the way I want it. I'm not sure I got the coat's proportions right but I did use the same pattern as alwys.

Then all that's left is the photo - in this case I felt like being arty and used some books as background. The one behind him is The Book Thief by Marcus Zusak.


Completed second attempt at Sandman plushie


If you're interested this is a comparison picture showing the previous attempt at the Sandman:


Photo showing both versions of the Sandman plushie

Previously  : Dream a little dream

Wednesday, 29 May 2013

A G[r]eek alphabet...help needed

Soooo I have a new project - I'm making something for a friend's baby.

It's going to be a nerdy/classical/children's alphabet!

So far the letters I've vaguely worked out

[update with friend's suggestions that I like as of 02/06/2013]

A - Athena, Apples of Hesperides, Great A'tuin
B - Binky ( Pratchett), ?Brunhilde (not sure how to do that yet), Big Bird, Books
C - Callisto (Ursa Major - constellation), Cheshire Cat
D - Daleks, Dwarves
E - Elmer the elephant, Elmo
F - ?Freya (not sure how to do that), Flamingo croquet (Alice), Feegles (Pratchett)
G - Greebo (Pratchett)
H - Heracles, Hogfather (Death as, Pratchett)
I - Icarus, Isis
J - Jam (“The rule is, jam tomorrow and jam yesterday-but never jam today" - White Queen in Alice), ?Jedi (not sure how to do yet)
K - Kraken, K9 (Doctor Who), Knight
L - Light sabers, Loki, luggage (Pratchett), Lego
M - Medusa, Millenium Falcon
N - Narcissus
O - Odysseus, Odin
P - Persephone Pomegranate
Q - Queens (Red, White- Alice)
R - Red Queen (Alice), White Rabbit?
S - Stark, Sonic Screwdriver, Star Trek
T - Tardis, Towel, Theseus
U - Unicorn, Uhura
V - Violin (Sherlock playing one), vampire (cout from Sesame Street)
W - Wizzard (Rincewind's hat, Pratchett), White Rabbit?
X - x wing
Y - Yggdrasil (world tree), Yoda
Z - Zeus

Monday, 15 April 2013

Dream a little dream....

It appears to be bad time right now for many people, but fortunately no-one I know or am semi closely related to is OK. I send love to all affected throughout the world by violence and suffering big and small, and offer a small distraction. A short post on my latest creation.

I was asked to make the character known by the multiple names of Dream, Morpheus and Sandman, one of the Endless, most particularly his incarnation in the comics written by Monsieur Gaiman. Not sure why he got a French mister there but meh.

There was a certain level of uncertainty about how to approach the doll as in essence he's rather simple and stark - a white skinned character with black eyes, hair and clothing. The details of what he wears seem fluid from a google search for details. Some have capes, some don't. Details are obscured by the black. There is a sense of flowing and black and sometimes bare feet.

Planning sketch of Gaiman's Morpheus/Dream


As I started making the doll there was an element in my choices of making it more complex or challenging as well as more interesting and appropriate. I did debate making his helmet but couldn't quite work out how I would do it and although it's known it's not all that iconic somehow.

So unusually as I normally work from basic body, outwards, stage 1 was the coat, which I decided to make in fake leather since I had some! I tried out a new technique for sewing whereby only the shoulders were sewn inside out with the under arm and sides sewn from the outside to stop the ripple effect along the front opening that happens when I sew it entirely inside out. I also decided to try making the sleeves separately. I was as always extremely extremely grateful that it was fake leather and thus didn't need hemming.

Black leather coat for Gaiman's Morpheus/Dream

This was kind of tough to sew with black thread on something shiny. I had to squint a bit without my glasses and in really strong light. I ended up with the sleeves slightly too long so I hemmed them a bit shorter and compensated by trying to make the arms of the body longer.

So yes, then I got to the body. I had a bit of a dither about the hair because I didn't have any black wool or anything I wanted for hair but I decided to hope someone would come through (at the last minute Mum found some) so I made a black hair base with embroidery for the fringe-y bits ("bangs" in American?)

Putting together the body parts and head for Gaiman's Morpheus/Dream

The sketch shows a belt but I got sidetracked by another idea - to give him some sense of flowing, I had some semi transparent black I'd used before which I chopped about with scissors as it wouldn't tear. It couldn't be added without complications before the body was sewn up as it would get in the way of turning it the right way out. So I made the body basically black with white hands and feet.

Then Dream was right sided out and I added the floaty bits. Finally I got to the hair. I couldn't work out how else to do it, so I cut lengths of wool and sewed them on to the stuffed and sewn up doll. In retrospect I should have stuffed but left the top open to allow for ease of sewing down the wool but I think it's relatively secure, so long as you don't really yank at it.

The fun last stage was that I cut the hair too long and then gave Dream a "shaggy" haircut. This was particularly fun because the requestor had asked for "wild" hair.

Final plushie of Gaiman's Morpheus Dream
So it is now complete. Eyes could have been bigger but I can't fix it now. I'm rather pleased with it.

In amusement afterthought as I was making this it occured to me that it resembled Neil Gaiman himself.

I mean dark shaggy hair, mainly black clothing, long coat? I nearly joke tweeted him that I should make an Amanda Palmer to go with but I didn't.